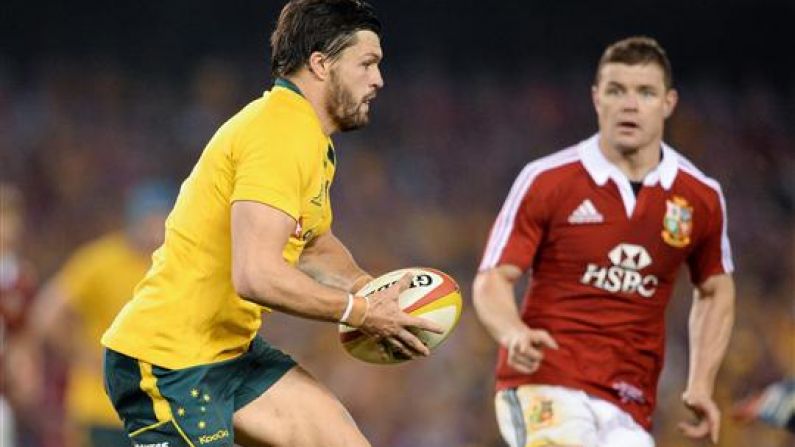

I’m going to look at the try from the Wallabies point of view first, quick recycling after Folau’s break has seen them make further inroads into the Lions 22 and the Lions are on the ropes. I’m going to praise Genia again, we’ve seen how he can spot a gap and exploit it and that’s exactly what he does once again. All he needs is a quick glance up to see what is on and he notices the potential of going down the short side which the Lions are a bit taken aback by and react quite sluggishly to Genia’s intentions.
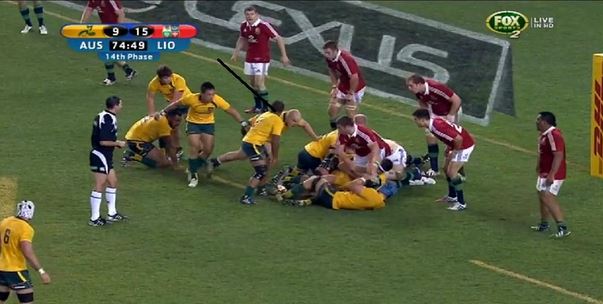
From the Lions defensive point of view, Dan Lydiate reacts slowly to the ball being out after an exhausting day where he compiled 13 tackles. I have Brian O’Driscoll circled in the image below, as you can see his hand is up in the air and from what I get from it he is saying push out. There is plenty of space an Australian score was quite probable but almost as important in this situation was the conversion. It would need to be as close to the corner to try and get the impeccable Lealiifano to miss. In attack we saw that both Davies and BOD were not on the same wavelength in my other piece, as this play develops I think it is further evident.
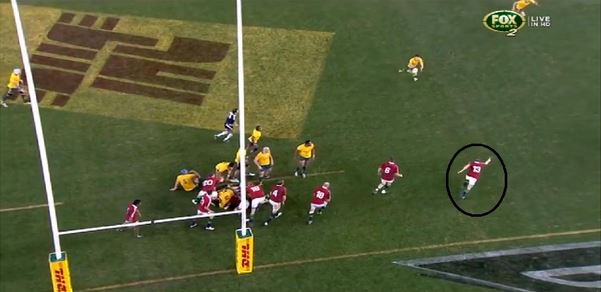
Tommy Bowe is out of the next shot as he is caught up with Joe Tomane, you could say he may be better off coming in off his wing but ultimately I don’t think that would have been the right move. As we saw from the last picture O'Driscoll is drifting, while the next shot shows his centre partner Davies. He must have missed the call from O’Driscoll to drift as he has his eyes completely focused on James O’Connor. Davies is completely flatfooted, Adam Ashley Cooper is almost completely unmarked. Davies’ body positioning is poor he is completely square which cannot happen in such a situation. He ultimately corrects himself but the damage is done as Ashley Cooper evades the despairing clutches of Davies and rumbles in for an easy score.